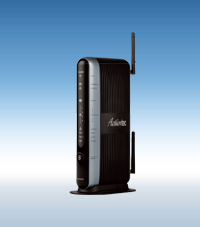
Verizon Fios Tech Support

  • Subscribe to our RSS feed.
  • Twitter
  • StumbleUpon
  • Reddit
  • Facebook
  • Digg

Tuesday, 18 December 2012

How to Cross-Compile libiconv for Android

Posted on 11:57 by Unknown
If your legacy C/C++ code includes <iconv.h> to convert the encoding of characters from one coded character set to another, and you need to cross-compile it with the Android NDK, you will get the following error:

   error: iconv.h: No such file or directory

In fact there is currently no iconv.h available in the Android NDK and you will have to port libiconv to Android yourself.
I successfully used the following instructions to cross-compile libiconv.so for Android.

Get the source code for libconv-1.13.1:
 
   $ wget http://ftp.gnu.org/pub/gnu/libiconv/libiconv-1.13.1.tar.gz
 
Unzip and untar the file:

   $ tar zxvf libiconv-1.13.1.tar.gz
 
Patch libcharset.c using the following patch file (or else you will get another error: : langinfo.h: No such file or directory) :
 
   $ echo "diff --ignore-file-name-case -wuprN libiconv-1.13.1.orig/libcharset/lib/localcharset.c libiconv-1.13.1/libcharset/lib/localcharset.c
--- libiconv-1.13.1.orig/libcharset/lib/localcharset.c  2009-06-21 07:17:33.000000000 -0400
+++ libiconv-1.13.1/libcharset/lib/localcharset.c       2012-12-18 10:20:27.000000000 -0500
@@ -44,7 +44,7 @@
 # endif
 #endif

-#if !defined WIN32_NATIVE
+#if !defined(WIN32_NATIVE) && !defined(__ANDROID__)
 # if HAVE_LANGINFO_CODESET
 #  include <langinfo.h>
 # else
@@ -328,7 +328,7 @@ locale_charset (void)
   const char *codeset;
   const char *aliases;

-#if !(defined WIN32_NATIVE || defined OS2)
+#if !(defined WIN32_NATIVE || defined OS2 || defined __ANDROID__)

 # if HAVE_LANGINFO_CODESET " > iconv.patch

   $ patch -b -p0 < ./iconv.patch


Run the configure script and generate iconv.h:

   $ cd libiconv-1.13.1
   $ ./configure

Create a jni sub-directory:
 
$ mkdir jni
 
And save the following lines in jni/Android.mk:

LOCAL_PATH := $(call my-dir)
include $(CLEAR_VARS)
TARGET_ARCH_ABI := armeabi-v7a
LOCAL_MODULE := iconv
LOCAL_CFLAGS := \
-Wno-multichar \
-D_ANDROID \
-DLIBDIR="\"c\"" \
-DBUILDING_LIBICONV \
-DIN_LIBRARY
LOCAL_C_INCLUDES := \
../libiconv-1.13.1 \
../libiconv-1.13.1/include \
../libiconv-1.13.1/lib \
../libiconv-1.13.1/libcharset/include
LOCAL_SRC_FILES := \
../libiconv-1.13.1/lib/iconv.c \
../libiconv-1.13.1/lib/relocatable.c \
../libiconv-1.13.1/libcharset/lib/localcharset.c
include $(BUILD_SHARED_LIBRARY)
 
Finally cross-compile iconv using the ndk-build tool:

   $ cd jni
   $ ndk-build V=1
If everything goes well, you will find iconv.h under libiconv-1.13.1/include and libiconv.so under libs/armeabi.
Read More
Posted in Android | No comments

Wednesday, 12 December 2012

PAINT released to the public for Research Purposes Only

Posted on 13:06 by Unknown
Digital Operatives is proud to release to the public for Research Purposes Only, a beta version of PAINT, Process Attribution In Network Traffic. PAINT is a standalone application that works alongside Wireshark to analyze process attribution data.  This release includes a custom version of Wireshark 1.6.5 to support process attribution.

Here is the link:   http://www.digitaloperatives.com/paint/index.html

See more information about PAINT here: http://digitaloperatives.blogspot.com/2012/10/process-attribution-in-network-traffic.html

Commercial and Government Users should email us at paint@digitaloperatives.com

Don't forget to email your issues, comments, bug reports to paint-bugs@digitaloperatives.com
Read More
Posted in | No comments

Tuesday, 4 December 2012

Configuring the Apple Airport Extreme with Verizon FIOS

Posted on 19:51 by Unknown
I have Verizon FIOS triple-play service and I love the TV picture quality and internet speed and reliability, but I don't like Verizon's solution to my Parental Control needs.
So I've decided to buy an Airport Extreme Base Station (AEBS) from Apple, but when I went to set it up, it configured itself for bridged mode since the Verizon modem is also a router and the Airport Utility decided not to have a double NAT configuration. Anyway by doing so you loose the capability of having a guest network with the Airport Extreme since it dummies itself down from a full fledged router to a simple level-2 switch.
So I managed to manually set it up in DHCP/NAT mode even though it is initially complaining about a double NAT configuration (one from the Verizon router and one from the AEBS), but least I gained my guest network back (at the time of this post it is not possible to configure a guest network with the Verizon router). 


Hardware Configuration


Apple Router: AirPort Extreme Base Station, Part Number: MD031LL/A 


Verizon Modem/Router: Actiontec MI424WR Rev. I
  • I used a CAT6 Patch cable to connect the AEBS Internet WAN port to Ethernet Port 1 of the Actiontec. This setting allows the two routers to communicate at wire speed of up to 1 GB per second.


Software Configuration


Here is the step by step procedure to set up the Airport Extreme I ran from an iMac running Mountain Lion.


  • Click on the picture of the Airport Extreme base station: a popup window will show an Edit button
  • Click on the Edit button
  • Click on the Network tab and select "DHCP and NAT" from the Router Mode
  • Click on the Network Options button and select "10.0" for the IPv4 DHCP Range, and "172.16" for the Guest IPv4 DHCP Range. Click on the Save button (see picture below)


  • Click on the Update button: this will reset the AEBS and cause a solid yellow light with a status of Double NAT. The AEBS will advise you to switch back to bridge mode
  • Click on the Double NAT Status pull-down menu and select Ignore: after another reboot the AEBS should come up with a solid green color


Regarding the Actiontec configuration, I left it as is, except for disabling the wireless mode to avoid interference with the AEBS.

  • With an internet browser log on to http://192.168.1.1 using the login and password printed on the bottom of the MI424WR modem/router.
  • Click on the Wireless Settings icon:

Wireless
Settings
  • Click on Basic Security Settings from the left panel
  • Click on Off from the 1. Turn Wireless ON form entry
  • Click on the Apply button to disable wireless

Considerations

Having the Verizon DHCP server using the 198.168.1.xxx IP addresses range and the AEBS the 10.0.1.xxx range will keep you sane and prevent confusions in your mind about which sub-network you are connected to. 
In any case these two sub-networks are completely separated and invisible from the Internet and you cannot have a device connected to one subnet talk to another device on the other subnet (unless you start configuring forwarding ports on the AEBS of course). This is OK since I plan to keep all of my computers and devices on the subnet controlled by the AEBS in order to have access control over each device.
To my disappointment the Airport Utility version 6.1 used to configure the AEBS is probably one the worst application I ever used to set up a router. It's not intuitive and worst of all it doesn't show who's connected to your network (or at least it doesn't show all the connected devices). In fact it only shows wireless clients in a weird fashion (by hovering over the base station picture), but no sign of any device connected through the Gigabit ethernet ports. By the way the list of wireless client is dynamic and you cannot even copy/paste the MAC addresses to add later to the access control table. I ended up switching to the previous version of Airport Utility (version 5.6 - as suggested by several people on the Internet) since with that you can still get a list of all devices connected to the AEBS from the Advanced->Logs and Statistics->DHCP Clients tab.

Still for parental control AEBS only has a time-based table where you can setup a schedule on a per MAC address basis. So I still had to resolve the problem of preventing my kids from hitting questionable web sites. I solved that by setting the OpenDNS servers for primary and secondary DNS servers in my Verizon router. OpenDNS offer a basic parental control filter based on categories. But I found that is is adequate for my needs.

Read More
Posted in Apple, DHCP, GPON, Network, Router | No comments

Thursday, 29 November 2012

Automatic Entity Recognition Identifying Antennas Locally - AERIAL

Posted on 06:51 by Unknown

Digital Operatives Kicks Off Project To Automatically Detect Antennas Using Computer Vision

Digital Operatives is a boutique cyber technology firm delivering advanced technologies that radically change the status quo in a multi-dimensional world.

Digital Operatives recently kicked off one of its latest projects under the Defense Advanced Research Projects Agency (DARPA) Cyber Fast Track program called AERIAL (Automatic Entity Recognition Identifying Antennas Locally). 

Existing approaches to conducting communication technology site surveys rely on detecting radio frequency (RF) emissions. This of course is only effective if and when the communications equipment is actively transmitting. Digital Operatives is investigating new approaches to the identification of communications equipment, more specifically antennas, by exploiting one of the few ways that such equipment can be universally detected: by applying state-of-the-art computer vision algorithms to identify antennas. In the AERIAL program, Digital Operatives is developing a prototype entity recognition system for the autonomous detection and classification of antennas. Digital Operatives vision is that this system will be deployed in a very small form factor; work is being done to develop the algorithms as an application on a mobile phone, as well as a sensor payload on a small Unmanned Aerial Vehicle (UAV) that could discover a broad range of antennas in a local area. The ability to automatically detect antennas visually and automatically is an exciting capability with multiple use cases.

Digital Operatives has discovered that small, thin objects like antennas provide a challenge to existing computer vision algorithms since traditional digital image features used in object recognition rely on the existence of facets (i.e., planar surfaces) on the object that are within the camera’s field of view. Since antennas usually appear as collections of one-dimensional lines in images, traditional computer vision and machine learning approaches for object detection will perform poorly. Digital Operatives addresses these challenges using a novel technique that exploits specific features of certain types of antennas such as Yagi-Uda and others.


The views expressed are those of Digital Operatives and do not reflect the official policy or position of the Department of Defense or the U.S. Government.
Read More
Posted in | No comments

Sunday, 25 November 2012

LifeProof iPhone Case Review

Posted on 10:19 by Unknown


   Today we are reviewing the LifeProof iPhone case, for iPhone 4 and 4S.  Like their slogan says its life-proof, which means waterproof, shock-proof, and dirt-proof.  It's a bit pricey at $79.99 retail, but all things considered its way cheaper then a new phone. There a many colors and to choose from.  Colors include black, pink, purple, white, blue, green, orange, red, and teal. I have the orange and my husband has the blue.

   The best thing about this cover is that it's not to bulky like some of the ones I have had.  It does add some bulk,  about 1/6" when measured from the center of the phone.  This is great,  just that little bit extra gives it such awesome protection. The  iPhone accessories are small enough to reach the ports that cover the headphone and charger location, but if you use something bigger the case comes with a cord that screws in so that the case maintains its waterproof-ness. They also sale an adapter for the charger port along with many other accessories.  The LifeProof items are readily available at your local Best Buy or at their website at LIFEPROOF.


   Now on with the reviews. I (Aimee) am much harder on my phone then Cody is on his.  In the past six years i have destroyed four of my phones  and one of Cody's. Three of those were iPhones, that's why I have had insurance on my iPhone since I've had one. A monthly bill that I have now canceled because of the protection of this case.  After a few months I have payed off the case in what I would have spent on the insurance.  This case is very rugged we have both dropped ours  a couple times with no scratches or damage done to the case or phone.  We've gotten dirt on them from yard work and it has not got inside to the phone.  We cant really test the snow part living in Florida, but if its good in water then snow should not be a problem.  Now we have yet to test the water but we will be doing a video on the test, results to come.  The cover is awesome, camera and flash work fine with it although it does muffle the sound a little bit when the bottom clip is closed, but there is going to be somethings you have to give up to have your phone safe.  Another drawback is that the protective screen is something to get used to at first.  Its not a big deal but at first we found it annoying that you have to put a little more pressure to press the buttons on the screen then you do without the case but we got used to it within the week.


    Cody's Rating for this phone cover is 3 1/2 schnauzers. Its a great cover but the price is a bit high and it is a cover that limits what you can do with you phone unless you are willing to pay for the extras but if you are prone to dropping your phone or have a loved one that is or just don't feel like paying for a new phone when you drop it in the rain and or toilet this is the case for you if not than I wouldn't suggest it

    Aimee's Rating is also 3 1/2 stars.  I'm constantly dropping (throwing, that's  what happened to Cody's iPhone) my phone.  I've dropped two iPhones in water, so I love the waterproof feature. And so far this has passed the test.  The only thing that really brings the rating down is the price. But like I said before if your paying phone insurance every month then the case will pay for itself after you cancel that. So if you are accident prone with your phones this is the case for you.


Read More
Posted in blogging, Husband and Wife perspective, iphone, LifeProof iPhone Case Review, product reviews, waterproof case | No comments

Tuesday, 20 November 2012

Python For Android (Py4A)

Posted on 07:01 by Unknown
A better solution for cross-compiling Python for Android is to use the Py4A project which is made to be used together with SL4A (Scripting Layer For Android). If you are only interested in the Python interpreter and the runtime Python library, you can also use it standalone.
Get a local copy of the source code using  the following command:

   $ hg clone https://code.google.com/p/python-for-android/

Just focus on the python-build subdirectory and make sure the  python-build/python-src subdirectory is not present (remove it if it came with the Mercurial repository, or else the compilation will fail).
Set up your environment so that the python-for-android build script can pick up the ndk-build script from the Android NDK:

  $ export ANDROID_NDK_ROOT=/home/<your-directory>/android-ndk-r8
  $ export PATH=$ANDROID_NDK_ROOT:$PATH

Finally build Python for Android by issuing the following command:

  $ cd python-for-android/python-build
  $ rm -rf python-src
  $ bash build.sh

Note that on my Ubuntu 12.04 machine I had initially the following compilation error:

Traceback (most recent call last):
  File "build.py", line 161, in <module>
    os.path.join(pwd, 'output.temp', 'usr'))
  File "build.py", line 89, in zipup
    zip_file = zipfile.ZipFile(out_path, 'w', compression=zipfile.ZIP_DEFLATED)
  File "/home/danilo/python-for-android/python-build/host/lib/python2.6/zipfile.py", line 660, in __init__
    "Compression requires the (missing) zlib module"
RuntimeError: Compression requires the (missing) zlib module


I identified the problem in having the zlib library in my system installed under /lib/x86_64-linux-gnu/ instead of one of the traditional lib directories covered by the Python setup.py script. Also on my system I only had libz.so.1 and not libz.so. So to fix both problems I just created a symlink in the standard /usr/lib directory as follows:

  $ cd /usr/lib
  $ sudo ln -s /lib/x86_64-linux-gnu/libz.so.1 libz.so

With this fix the build.sh script was able to successfully build the zlib module for the host environment and create the following zipped files:

  • python_extras_r14.zip
  • python-lib_r16.zip
  • python_r16.zip
  • python_scripts_r13.zip

Of these I only used the python_r16.zip which contains the stripped python interpreter and the runtime libraries, and the python-lib_r16.zip which contains the include header files such as Python.h that can be used to compile Python bindings at development time.


Read More
Posted in Android, Linux, Python | No comments

Monday, 5 November 2012

Arduino and 7-segment LED counter driven by two tactile switches

Posted on 14:16 by Unknown
I have posted on YouTube a couple of videos about a project I made with the Arduino prototype board. The circuit uses an Arduino mini and has a simple gear counter based on a 7-segment LED and controlled by two switches. It can be mounted on your bike and used for example to visualize which gear you are in at any time.

If you are interested in the schematics I can send you the PCB Artist version by email. The Arduino code is instead available below.

/*
Blink

Turns on an LED on for one second, then off for one second, repeatedly.

The circuit:
* LED connected from digital pin 13 to ground.

* Note: On most Arduino boards, there is already an LED on the board
connected to pin 13, so you don't need any extra components for this example.


Created 1 June 2005
By David Cuartielles

http://arduino.cc/en/Tutorial/Blink

based on an orginal by H. Barragan for the Wiring i/o board

*/

#define BUTTON_DOWN 10
#define BUTTON_UP 12

int ledPinA = 6; // LED connected to digital pin 3
int ledPinB = 9; // LED connected to digital pin 4
int ledPinC = 4; // LED connected to digital pin 5
int ledPinD = 3; // LED connected to digital pin 6
int ledPinE = 2; // LED connected to digital pin 7
int ledPinF = 7; // LED connected to digital pin 8
int ledPinG = 8; // LED connected to digital pin 9
int ledPinDP = 5; // LED connected to digital pin 10

int val_down = 0;
int old_val_down = 0;
int val_up = 0;
int old_val_up = 0;
int state = 0;
int gear = 1;

// The setup() method runs once, when the sketch starts

void setup() {
pinMode(BUTTON_DOWN, INPUT);
pinMode(BUTTON_UP, INPUT);

// initialize the digital pin as an output:
pinMode(ledPinA, OUTPUT);
pinMode(ledPinB, OUTPUT);
pinMode(ledPinC, OUTPUT);
pinMode(ledPinD, OUTPUT);
pinMode(ledPinE, OUTPUT);
pinMode(ledPinF, OUTPUT);
pinMode(ledPinG, OUTPUT);
pinMode(ledPinDP, OUTPUT);

// initialize serial communication:
Serial.begin(9600);
}

void led0()
{
digitalWrite(ledPinA, LOW);
digitalWrite(ledPinB, LOW);
digitalWrite(ledPinC, LOW);
digitalWrite(ledPinD, LOW);
digitalWrite(ledPinE, LOW);
digitalWrite(ledPinF, LOW);
digitalWrite(ledPinG, HIGH);
digitalWrite(ledPinDP, HIGH);
}

void led1()
{
digitalWrite(ledPinA, HIGH);
digitalWrite(ledPinB, LOW);
digitalWrite(ledPinC, LOW);
digitalWrite(ledPinD, HIGH);
digitalWrite(ledPinE, HIGH);
digitalWrite(ledPinF, HIGH);
digitalWrite(ledPinG, HIGH);
digitalWrite(ledPinDP, HIGH);
}

void led2()
{
digitalWrite(ledPinA, LOW);
digitalWrite(ledPinB, LOW);
digitalWrite(ledPinC, HIGH);
digitalWrite(ledPinD, LOW);
digitalWrite(ledPinE, LOW);
digitalWrite(ledPinF, HIGH);
digitalWrite(ledPinG, LOW);
digitalWrite(ledPinDP, HIGH);
}

void led3()
{
digitalWrite(ledPinA, LOW);
digitalWrite(ledPinB, LOW);
digitalWrite(ledPinC, LOW);
digitalWrite(ledPinD, LOW);
digitalWrite(ledPinE, HIGH);
digitalWrite(ledPinF, HIGH);
digitalWrite(ledPinG, LOW);
digitalWrite(ledPinDP, HIGH);
}

void led4()
{
digitalWrite(ledPinA, HIGH);
digitalWrite(ledPinB, LOW);
digitalWrite(ledPinC, LOW);
digitalWrite(ledPinD, HIGH);
digitalWrite(ledPinE, HIGH);
digitalWrite(ledPinF, LOW);
digitalWrite(ledPinG, LOW);
digitalWrite(ledPinDP, HIGH);
}

void led5()
{
digitalWrite(ledPinA, LOW);
digitalWrite(ledPinB, HIGH);
digitalWrite(ledPinC, LOW);
digitalWrite(ledPinD, LOW);
digitalWrite(ledPinE, HIGH);
digitalWrite(ledPinF, LOW);
digitalWrite(ledPinG, LOW);
digitalWrite(ledPinDP, HIGH);
}

void led6()
{
digitalWrite(ledPinA, LOW);
digitalWrite(ledPinB, HIGH);
digitalWrite(ledPinC, LOW);
digitalWrite(ledPinD, LOW);
digitalWrite(ledPinE, LOW);
digitalWrite(ledPinF, LOW);
digitalWrite(ledPinG, LOW);
digitalWrite(ledPinDP, HIGH);
}

void led7()
{
digitalWrite(ledPinA, LOW);
digitalWrite(ledPinB, LOW);
digitalWrite(ledPinC, LOW);
digitalWrite(ledPinD, HIGH);
digitalWrite(ledPinE, HIGH);
digitalWrite(ledPinF, HIGH);
digitalWrite(ledPinG, HIGH);
digitalWrite(ledPinDP, HIGH);
}

void led8()
{
digitalWrite(ledPinA, LOW);
digitalWrite(ledPinB, LOW);
digitalWrite(ledPinC, LOW);
digitalWrite(ledPinD, LOW);
digitalWrite(ledPinE, LOW);
digitalWrite(ledPinF, LOW);
digitalWrite(ledPinG, LOW);
digitalWrite(ledPinDP, HIGH);
}

void led9()
{
digitalWrite(ledPinA, LOW);
digitalWrite(ledPinB, LOW);
digitalWrite(ledPinC, LOW);
digitalWrite(ledPinD, LOW);
digitalWrite(ledPinE, HIGH);
digitalWrite(ledPinF, LOW);
digitalWrite(ledPinG, LOW);
digitalWrite(ledPinDP, HIGH);
}

void ledDP()
{
digitalWrite(ledPinA, HIGH);
digitalWrite(ledPinB, HIGH);
digitalWrite(ledPinC, HIGH);
digitalWrite(ledPinD, HIGH);
digitalWrite(ledPinE, HIGH);
digitalWrite(ledPinF, HIGH);
digitalWrite(ledPinG, HIGH);
digitalWrite(ledPinDP, LOW);
}

void setLed(int number)
{
switch (number) {
case 0:
ledDP();
break;
case 1:
led1();
break;
case 2:
led2();
break;
case 3:
led3();
break;
case 4:
led4();
break;
case 5:
led5();
break;
case 6:
led6();
break;
case 7:
led7();
break;
case 8:
led8();
break;
case 9:
led9();
break;
}
}

// the loop() method runs over and over again,
// as long as the Arduino has power

void oldloop()
{
ledDP();
delay(1000); // wait for a second
led0();
delay(1000); // wait for a second
led1();
delay(1000); // wait for a second
led2();
delay(1000); // wait for a second
led3();
delay(1000); // wait for a second
led4();
delay(1000); // wait for a second
led5();
delay(1000); // wait for a second
led6();
delay(1000); // wait for a second
led7();
delay(1000); // wait for a second
led8();
delay(1000); // wait for a second
led9();
delay(1000); // wait for a second
}

void loop()
{
val_up = digitalRead(BUTTON_UP);
if ((val_up == HIGH) && (old_val_up == LOW)) {
gear += 1;
Serial.print("gear number: ");
Serial.println(gear, DEC);
delay(100);
}
old_val_up = val_up;

val_down = digitalRead(BUTTON_DOWN);
if ((val_down == HIGH) && (old_val_down == LOW)) {
gear -= 1;
Serial.print("gear number: ");
Serial.println(gear, DEC);
delay(100);
}
old_val_down = val_down;

if (gear >= 6) {
gear = 6;
}
if (gear <= 1) {
gear = 1;
}

setLed(gear);
}

Read More
Posted in Arduino | No comments

Friday, 26 October 2012

How to cross-compile Python for Android

Posted on 07:51 by Unknown
When it comes to cross-compiling Python for Android, I've followed Gabriel's blog post @ http://mdqinc.com/blog/2011/09/cross-compiling-python-for-android/ and I was successful in creating an Arm-based Python executable (and related libraries) in little or no time.
Gabriel has a lot of the initial steps just verbally described, but I've come up with a shell script that allows you to automate the entire process. Of course you need to replace <path-to-android-ndk> with the directory where you have installed the NDK.
Here it goes.

ANDROID_NDK=<path-to-android-ndk>
ANDROID_ABI="armeabi-v7a"
ANDROID_NATIVE_API_LEVEL="android-8"
PYTHON_VERSION="2.6.2"


output_dir=$1
mkdir -p $output_dir
cd $output_dir
# get Python source tarball
wget http://www.python.org/ftp/python/$PYTHON_VERSION/Python-$PYTHON_VERSION.tgz

# create Python Host version
tar zxvf Python-$PYTHON_VERSION.tgz
mv Python-$PYTHON_VERSION Host-Python-$PYTHON_VERSION-src
cd Host-Python-$PYTHON_VERSION-src
./configure --prefix=$output_dir/Host-Python-$PYTHON_VERSION
make
make install

cd $output_dir
# create Python Cross-compiled version for Android
tar zxvf Python-$PYTHON_VERSION.tgz
mv Python-$PYTHON_VERSION Android-Python-$PYTHON_VERSION-src
cd Android-Python-$PYTHON_VERSION-src

# get and apply Python patch
wget -o 
Python-2.6.2-android.patch https://sites.google.com/site/dgtechblogscripts/Python-2.6.2-android.patch
patch -p0 < Python-2.6.2-android.patch
# fix setup.py
mv setup.py setup.py.orig
cat setup.py.orig | awk '{ if (NR==316) {print "    " $0} else {print $0}}' > setup.py

MY_HOSTPYTHON=$output_dir/Host-Python-$PYTHON_VERSION/bin/python
MY_HOSTPGEN=$output_dir/Host-Python-$PYTHON_VERSION-src/Parser/pgen

export ANDROID_NDK
export PATH="$ANDROID_NDK/toolchains/arm-linux-androideabi-4.4.3/prebuilt/linux-x86/bin/:$ANDROID_NDK:$ANDROID_NDK/tools:/usr/local/bin:/usr/bin:/bin"
export ARCH=$ANDROID_ABI
export CFLAGS="-DANDROID -mandroid -fomit-frame-pointer --sysroot $ANDROID_NDK/platforms/$ANDROID_NATIVE_API_LEVEL/arch-arm"
export CXXFLAGS="$CFLAGS"
export CC="arm-linux-androideabi-gcc $CFLAGS"
export CXX="arm-linux-androideabi-g++ $CXXFLAGS"
export AR="arm-linux-androideabi-ar"
export RANLIB="arm-linux-androideabi-ranlib"
export STRIP="arm-linux-androideabi-strip --strip-unneeded"
export MAKE="make -j4 install HOSTPYTHON=$MY_HOSTPYTHON HOSTPGEN=$MY_HOSTPGEN CROSS_COMPILE=arm-eabi- CROSS_COMPILE_TARGET=yes"

./configure LDFLAGS="-Wl,--allow-shlib-undefined" CFLAGS="-mandroid -fomit-frame-pointer --sysroot $ANDROID_NDK/platforms/$ANDROID_NATIVE_API_LEVEL/arch-arm" HOSTPYTHON=$MY_HOSTPYTHON HOSTPGEN=$MY_HOSTPGEN --host=arm-eabi --build=i686-pc-linux-gnu --enable-shared --prefix="$output_dir/Android-Python-$PYTHON_VERSION"
sed -i "s|^INSTSONAME=\(.*.so\).*|INSTSONAME=\\1|g" Makefile
$MAKE


Read More
Posted in Android, Python | No comments

Installing the Android NDK

Posted on 07:36 by Unknown
These instructions refer to a Ubuntu 12.04.1 LTS system running on an Intel processor.

  • Head to the http://developer.android.com/tools/sdk/ndk/index.html web site and download the latest version of the Android NDK for Linux (release r8b for example):
    $ wget http://dl.google.com/android/ndk/android-ndk-r8b-linux-x86.tar.bz2

  • Unzip and untar the downloaded file in your preferred directory:
    $ bunzip2 android-ndk-r8b-linux-x86.tar.bz2
    $ tar zxvf android-sdk_r20.0.3-linux.tgz
You should now have a directory called  android-ndk-r8b containing release 8b of the Android NDK.
Read More
Posted in Android | No comments

Tuesday, 16 October 2012

Process Attribution In Network Traffic

Posted on 14:38 by Unknown

Author: Phil -at- DigitalOperatives

Overview

Digital Operatives recently completed a DARPA Cyber Fast Track (CFT) contract called Process Attribution in Network Traffic (PAINT). The goal of this project was to build an easy to use software product that is capable of attributing originating and receiving Process IDs (PIDs) and Process Names for TCP/IP packets on a Windows system in real-time. We chose Wireshark as the implementation platform since it is a very popular and one of the most useful open-source network analysis tools available today.
Our challenge in designing a packet-to-process attribution scheme was to take process-related metadata available at the TCP/IP layer and correlate it with discrete frames of network activity available at the bottom of the network stack (the NDIS layer). We considered several potential approaches to solving this problem, including implementing kernel-mode drivers, but we ultimately found that it was possible using a novel application of Event Tracing for Windows (ETW). Beginning with Windows 7, the various components in the network stack are able to generate trace messages via ETW that provide a way to collect correlated end-to-end network stack activity.

Motivation

We believe network traffic analysis and visualization are regarded as fundamental pillars of cyber defense. Wireshark is one of the most well-known and widely used network analysis tools. It’s useful for dynamic malware analysis and reverse engineering due to its powerful system of filters that allow the analyst to focus on network packets between selected hosts or using only certain protocols. However, due to the way it traces network traffic, it cannot determine the process on the host system that is responsible for sending or receiving that traffic. Thus, malware is able to hide its network communications semi-anonymously in the noise of legitimate network activity using similar protocols and data flow patterns. By PAINT-ing Wireshark, we are able to attribute all TCP/IP traffic to responsible processes and allow human and machine analysts to detect anomalies and potential malware traffic easily.

Comparison to Other Process Attribution Software Products

We believe PAINT/Wireshark is one of a kind but there are a couple software products that partially achieve PAINT/Wireshark’s real-time TCP/IP process attribution and packet capture functionalities on the Windows platform: Network Monitor and Process Monitor.
  • Microsoft Network Monitor (NetMon) is a free network packet capturing software from Microsoft. It looks up the TCB (TCP Control Block) in semi-real-time to attribute network packets to processes. It can, however, only attribute TCP traffic and not UDP traffic. Another NetMon limitation is that it only periodically queries the TCB due to performance constraints. It’s possible for a TCP connection to exist between the TCB polls and cause a false-negative.
  • Process Monitor is another Microsoft (SysInternals) tool. It logs virtually all attributable application activities including network activities. However, it can only attribute network connection activity and does not capture the traffic content like PAINT/Wireshark or Network Monitor.
  • On Linux, there is a tool that partially achieves what we are doing with PAINT, which is a program called NetHogs. It can attribute network traffic usage totals to individual processes, but it lacks the ability to attribute data at a per-packet level, and is limited to TCP only.
  • On the Mac OS X platform there is Private Eye. It is a simplified and user-friendlier tool similar to the Process Monitor. It does not attribute traffic at a per-packet level.

Event Tracing for Windows

Event Tracing for Windows (ETW) is a logging mechanism provided by Windows. It enables any user or kernel processes to log an event and lets any user or kernel processes subscribe to and receive events as broadly or as selectively as desired. Each ETW event contains an Activity ID that is used to perform a call trace within a single thread of control. ETW was first introduced in Windows 2000 and has been improving with subsequent Windows releases as more components of the system provide tracing information via ETW. PAINT/Wireshark requires the end-to-end ETW tracing information from the network stack components, which was first introduced in Windows 7.

Technical Overview

We identified 3 ETW providers built-in to Windows that gave us raw network packet capture, TCPIP events with PID, and a way to correlate the two: Microsoft-Windows-NDIS-PacketCapture (referred to as “ETW-NDIS” henceforth for brevity), Microsoft-Windows-TCPIP (referred to as “ETW-TCPIP” henceforth), and Microsoft-Windows-Networking-Correlation (referred to as “ETW-Correlation” henceforth), respectively.
While both the ETW-TCPIP and ETW-NDIS events contain the Activity ID field, these fields cannot be correlated in the traditional ETW event correlation fashion because they occur in different OS threads. Thankfully the ETW-Correlation provider sends out Activity Transfer events that correlates the ETW-TCPIP Activity IDs to the ETW-NDIS Activity IDs. Correlating these events in real-time proved to be non-trivial as it originally seemed, and we believe there’s at least a small room for improvement in the correlation state-machine for both attribution and run-time performance.
We modified Wireshark 1.6.5 to introduce PID and process name columns. We introduced a new binary file (.process) that pairs with the .pcap file. The current version of PAINT looks for the .process file whenever a .pcap file is opened and reads the process information to display (functions normally when it’s not found). We created our own dumpcap.exe implementation that replaces the original dumpcap.exe to provide the packet captures and the .process file using the ETW-NDIS provider.

The Result

As you can see the result looks great! Process information seamlessly integrates into Wireshark 1.6.5 in real-time and file-open operation modes.
Performance wise, we believe we achieve 0% false-positive (no wrongly attributed traffic) and 0% false-negative (no missing correct attribution) rates for UDP traffic and 0% false-positive and ~20% false-negative rates for TCP traffic. Currently, we can attribute about 100 packets per second on a typical Core2 machine.
We plan on making our custom Wireshark code available so that other pcap/PID providers can follow the same design paradigm enabling network traffic process attribution in Wireshark. Wireshark is not affected by our code if the original dumpcap.exe is used.
Please inquire at contact -at- digitaloperatives -dot- com for more information. Also stay tuned for details on PAINT Enterprise, an enterprise tool enabling easy-to-manage whole network process attribution.

Read More
Posted in | No comments

Thursday, 11 October 2012

Problems with new version of rpmbuild

Posted on 11:50 by Unknown

The Problem

With the new version of rpmbuild installed on CentOS 6.x, if you try to use an old RPM spec file, you will get an error like the following:

error: File not found: <path>/BUILDROOT/<product>-6.7.x86_64/<filename>

Previously rpmbuild would install and look for files under the rpm_top/BUILD directory, while now it looks under the new BUILDROOT directory.

The Solution

This is what I ended up doing to solve the problem. When I call rpmbuild I now define a new variable, for example:

$ centos_release=$(lsb_release -rs | sed 's/\.//')
$ rpmbuild --define "centos_release $centos_release" ... -bb specfile 


then I changed my spec file to contain something like the following:

%if %{centos_release} >= 60

%setup -q -c -n %{buildroot}/usr/local/
cp -a -r %{buildroot}/usr/local/ /usr/
 
%else
 
%setup -q -c -n usr/local/
%install
cp -a -r $PWD /usr/
 
%endif

Another related problem

Suppose you have a single tar ball and you want to create two or more RPMs using different spec files. The new version of rpmbuild automatically cleans the BUILDROOT directory after completing the targets for a given spec file. If you want to save time and have the second spec file just look for the BUILDROOT created by the first spec it won't find it because of the automatic clean. So it seems like you are forced to untar and install under the BUILDROOT your file over and over again.
A simple solution to this problem is to add a %clean directive to your spec file and do nothing to disable to automatic cleaning done by rpmbuild. Add the following line at the bottom of your spec file:

%clean

Read More
Posted in CentOS, Linux | No comments

Monday, 8 October 2012

Installing the Android SDK

Posted on 13:16 by Unknown
These instructions refer to a Ubuntu 12.04.1 LTS system running on an Intel processor.
  • Head to the developer.android.com web site and download the latest version of the Android SDK for Linux (release 20.0.3 for example): http://dl.google.com/android/android-sdk_r20.0.3-linux.tgz 
  • Untar the downloaded file in your preferred directory:
    $ tar zxvf android-sdk_r20.0.3-linux.tgz
You should now have a directory called  android-sdk-linux containing release 20.0.3 of the Android SDK.
Read More
Posted in Android | No comments

Saturday, 6 October 2012

Porting your Legacy C/C++ project to Android

Posted on 17:49 by Unknown


This is a recurring problem people have often: trying to port a big C/C++ project to the Android platform. You have thousands of lines of tested and working C/C++ code that you want to reuse and access from your Android application. So far Android only provides an SDK for Java applications, only supports devices with ARM, MIPS and x86 architectures, and several steps are necessary if you want to port your code and call it from Java as a library. By large the biggest deployment is for ARM processor devices, so we are initially focused on porting our code to this architecture.
Porting your C/C++ project to the Android platform entails then the following steps:
  1. Cross-compile the C/C++ code for the ARM processor (or any other supported) architecture.
  2. Develop a JNI module allowing an Android application to natively call the C/C++ code from Java.
  3. Develop an Android application using the JNI module.
  4. Run and debug the app on an Android device.
Developing an Android application requires the Android Software Development Kit (SDK), while cross-compiling your C/C++ code and developing the JNI module for Android requires the Android Native Development Kit (NDK). Both these kits run on Windows XP/Win7, Mac OS 10.5.8 or later (Intel), or Ubuntu Linux 8.04 or later.

My intention is to publish on this blog several posts with detailed instructions on how to accomplish the above mentioned steps. The instructions are based on other posts you can search on the internet and on my experience with Android. All the instructions are based on the development and testing environments described below.

Development Environment

  • Processor: Intel(R) Core(TM) 2 Duo CPU     E8600  @ 3.33GHz
  • RAM: 4GB DDR2 SDRAM DIMM 240-pin
  • OS: Ubuntu Linux 12.04
  • Eclipse IDE Juno
  • Android SDK r20
  • Android NDK r8

Testing Environment

  • LG Thrill 4G - Android 2.2
  • Samsung Galaxy Tab 8.9 - Android 3.2
  • Samsung Galaxy Tab 2 7.0 - Android 4.01
  • Samsung Galaxy S III - Android 4.0.4

Read More
Posted in Android | No comments
Newer Posts Older Posts Home
Subscribe to: Posts (Atom)

Popular Posts

  • How to compile busybox with Android NDK for both ARM and x86 architectures
    I was looking for a way to run busybox on a Motorola RAZRi with an x86 Intel Atom processor but I couldn't find any Android app from th...
  • Security and Trust when Everything has a Computer In It
    Security and Trust when Everything has a Computer In It Recently, Panic Software announced that they had opened up an HDMI display adapter ...
  • Sony Cyber-shot DSC-HX200V 18.2 MP 30 x High Zoom GPS Digital Camera - BLACK
    Sony Cyber-shot DSC-HX200V 18.2 MP 30 x High Zoom GPS Digital Camera - BLACK Blogger Opportunity Giveaway from June 17 to  July 12 Come and ...
  • Free Blogger Opp – Timjan Design Malachite 5/1
    Here comes another Visionary Bri blogger opportunity. Sign up now for the Timjan Bloomers Giveaway. Our sponsor, Timjan Design , has offered...
  • Hackers that solve problems...
    The nation and the world at large are struggling to come to grips with the fact that we are now more than ever vulnerable in our daily lives...
  • How to build Python-4-Android for the ARM Neon
    Currently the Py4A project does not compile for the ARM Neon architecture. If you try to run ndk-build on the project by setting the APP_A...
  • How to Cross-Compile libiconv for Android
    If your legacy C/C++ code includes <iconv.h> to convert the encoding of characters from one coded character set to another, and you ne...
  • How to compile libogg for Android
    To compile libogg for Android, you just need to create an appropriate jni/Android.mk makefile with the minimum set of files and options need...
  • Problems with new version of rpmbuild
    The Problem With the new version of rpmbuild installed on CentOS 6.x, if you try to use an old RPM spec file, you will get an error like the...
  • Sony Cyber-shot DSC-HX200V Giveaway
    Hosted by: NYSavingSpecials and Your Fashion Resource ,  Co-hosted by Melissa Say What? ,  Barbara's Beat ,  LibbysLibrary ,  Confessio...

Categories

  • amazon
  • amazon.com
  • Android
  • Apple
  • Arduino
  • ARM
  • baby
  • baby reviews
  • back to school
  • beef jerky
  • bicycle. wagon
  • bike
  • Blanket Buddies
  • blogging
  • Blogging with The Tate's
  • books
  • busybox
  • camera
  • camera giveaway
  • candle giveaway
  • candles
  • CaseApp
  • CentOS
  • coffee
  • david haskell
  • dermorganic
  • DHCP
  • digital camera
  • events
  • Florida
  • Fortran
  • free blogger giveaway
  • free blogger sign-ups
  • full of flavor
  • giveaways
  • GNU
  • GPON
  • hair care
  • happy husband
  • Hot tea
  • Husband and Wife perspective
  • iMac
  • ipad
  • iphone
  • iphone case
  • iphone case review
  • Javascript
  • Keurig Coffee Review
  • Keurig Review
  • Kindle
  • ksh
  • LifeProof iPhone Case Review
  • Linux
  • MacOSX
  • Malachite Bloomers
  • man and women perspective
  • meat
  • Mips
  • Network
  • Pretzel Crisps
  • Pretzels
  • product reviews
  • products
  • Python
  • Router
  • scentsy
  • scentsy candles
  • school
  • scooter
  • security system
  • skin care
  • snacks
  • sony
  • sony cyber-shot
  • Stuff Animal
  • suface pro
  • Summer
  • summer fun
  • surface pro giveaway
  • techno thriller
  • Timjan Design
  • too much information
  • UNIX
  • vegan
  • vegan products
  • verizon
  • verizon fios
  • VitaminsBaby
  • waterproof case
  • Windows
  • x86
  • yummy

Blog Archive

  • ►  2013 (41)
    • ►  November (2)
    • ►  October (2)
    • ►  September (3)
    • ►  August (3)
    • ►  July (2)
    • ►  June (2)
    • ►  May (6)
    • ►  April (8)
    • ►  March (2)
    • ►  February (5)
    • ►  January (6)
  • ▼  2012 (17)
    • ▼  December (3)
      • How to Cross-Compile libiconv for Android
      • PAINT released to the public for Research Purposes...
      • Configuring the Apple Airport Extreme with Verizon...
    • ►  November (4)
      • Automatic Entity Recognition Identifying Antennas ...
      • LifeProof iPhone Case Review
      • Python For Android (Py4A)
      • Arduino and 7-segment LED counter driven by two ta...
    • ►  October (8)
      • How to cross-compile Python for Android
      • Installing the Android NDK
      • Process Attribution In Network Traffic
      • Problems with new version of rpmbuild
      • Installing the Android SDK
      • Porting your Legacy C/C++ project to Android
    • ►  July (1)
    • ►  June (1)
Powered by Blogger.

About Me

Unknown
View my complete profile