Verizon Fios Tech Support

  • Subscribe to our RSS feed.
  • Twitter
  • StumbleUpon
  • Reddit
  • Facebook
  • Digg
Showing posts with label Apple. Show all posts

Sunday, 7 April 2013

Tablet Review

Posted on 13:48 by Unknown
The Kindle Fire HD from Amazon.com and the Apple iPad 2 are up next for review.

Aimee-
iPad 2- $399


Product Features
9.7" LED-backlit display with IPS technology
Dual-core A5 chip
Front and back cameras
Up to 10 hours of battery life
Built-in Wi-Fi (802.11a/b/g/n)
Bluetooth 2.1 + EDR technology
16GB flash storage
Over 65,000 apps made for iPad, available from the App Store

  I got my iPad as a birthday gift last July. I didn't get the 3G version because I really didn't think I would need Internet on it outside my house, that's what my iPhone is for. But the good thing is that a lot of places have free wi-fi now. Its like having a computer at your finger tips, without having to carry around a heavy laptop. I'm using my iPad to write this review.
  The ipad is a wonderful tool for many things reading books, games, searching the Internet, watching movies and tv and so much more. It comes with apps already installed to get you started. The iBook app, for reading books. You can download books from the iTune marketplace. In the App Store there are many other apps you can download for reading books, you can even download a kindle app to read kindle books on. There's apps for watching tv from various tv networks, there's Netflix and Hulu. So many apps to enjoy.
  Another great thing is the games. There are a lot of free/paid iPad games to download. I usually just get the free ones, they are very enjoyable. Every time I go see my four year old niece and one year old nephew they always get in my bag and pull the iPad out to play with. It's crazy how fast kids learn technology these days.
The iPad is about twice the size of a kindle which I don't mind. Bigger size is great for video watching but at night it makes holding it a little harder to read at night. This hasn't been a huge issue though. Over all I think the iPad is a great product and I recommend it.

Cody-
Kindle Fire HD- $199


Product Features
7" 1280x800 HD display
Exclusive Dolby audio
Dual-band, dual-antenna Wi-Fi
Featuring Multiple In/Multiple Out (MIMO) technology
16GB on-device storage
High-performance 1.2GHz dual-core processor

  Looks wise it is cool, just the right size, not to big not to small. I got this as a birthday gift from Aimee it was a Kindle or a PSP Vita, I picked the Kindle. Do I regret it, no not at all. I knew that after a few months into owning the PSP I would be tired of it and then pick it up once in a while. On the other hand with the Kindle I can read books, comic books, watch movies, and surf the web. As long as I'm in a WiFi area.
  As far as reading function goes I have always been a hands on kind of guy. I like real books, the way they feel and the way they smell. So when e-readers first started coming out I scoffed at them saying "they will never last." I have said this about a lot of things before (CDs, DVDs, Blu Rays). And every time I'm wrong. My wife, Aimee, ended up getting an iPad for her birthday and after playing with it for a bit I was sold. Tablets are cool, very cool. I wasn't a fan of the size, or the price, but it's very cool and easy to use. So I wanted one. I did some research and decided on a Kindle. When I got mine first thing I did was download a bunch of books I have wanted to read. I also downloaded some I have already read (John dies at the End). I love it. A great thing about tablets is reading in the dark. This is great for when your bed partner is sleeping. It's the perfect size, and I like that I don't have to worry about messing my books up. It's not heavy, it's much lighter then carrying all the actual books around. It has some awesome apps it's almost as useful as my iPhone. Down side is, not 3g capable. Not that I would want to pay for a 3g plan anyway but it's nice to have the option for other people. But In my opinion it doesn't take any points away from the great product. I love it might not be the one for everyone but if you are looking for cheap and easy this is for you.


We have written all of our reviews on our respective tablets. Then we email them to ourselves to post them from the computer. We both love our tablets respectively. And recommend both. Choosing which all depends on what you want and how much you want to spend.


Read More
Posted in amazon, Apple, blogging, Blogging with The Tate's, Florida, Husband and Wife perspective, ipad, Kindle, man and women perspective, product reviews, products | No comments

Sunday, 6 January 2013

Upgrading mid-2007 24in iMac with an SSD and a 2.5in HDD in the optical bay

Posted on 18:40 by Unknown
I own a mid-2007 24in iMac with a 2.4 GHz Intel Core 2 Duo processor, 4GB of DDR2 DRAM, running Mac OS Mountain Lion, and for the past few months the computer was getting slower and slower, and when I was running Windows XP in VMWare Fusion, the machine was often swapping, bringing the iMac to a crawl. Finally I decided to upgrade my iMac by installing an SSD. Two years ago I replaced the Western Digital 500 GB hard drive (that failed on me one day by giving me the gray screen of death at boot time), with a 1 TB WD caviar green which I almost filled since then (about 750 GB used).
So I wanted the fast SSD drive but also to maintain the 1 TB of space available. The solution I adopted (found on several posts on the internet) was to replace the existing SATA HDD with an SSD, and replace the optical drive with a PATA to SATA adapter hosting a 2.5in HDD. To avoid the swapping I also replaced one of the 2 GB memory modules with a new OWC 4GB module, bringing the total available memory to 6GB.

Hardware Parts

This is the list of hardware components I ended up buying for this upgrade:

  • Crucial M4 CT064M4SSD2 2.5" 64GB SATA III MLC Internal Solid State Drive (SSD)
  • SilverStone SDP08 2 x 2.5" to 3.5" Bay Converter
  • Western Digital Scorpio Blue WDBABC0010BNC-NRSN 1 TB 2.5' Internal Hard Drive
  • MCE OptiBay Enclosure for SATA Hard Drive for iMac
  • 4.0GB PC-5300 DDR2 667MHz SO-DIMM 200 Pin Memory Upgrade Module

Hardware Installation

Here is the picture of the tools I used to perform the upgrade (grounding wrist band, 6 Pc. mini torx screwdriver set, spudgers, vacuum cups, philips screwdriver.


I followed the instructions to replace the hard drive and the optical bay from the iFixit web site.
The following picture shows the iMac internal components.


The old 1TB caviar green HDD is shown in the following picture. The idea was to replace it with the SSD mounted on the 2.5'' to 3.5'' bay converter.


This picture shows instead the Apple optical drive (superdrive).


I removed the optical drive and replaced it with the 1TB WD Blue HDD mounted on the MCE OptiBay enclosure as shown in the following picture. I also put a piece of foam in the enclosure gap (top of picture) to prevent the HDD from moving.


Then I installed the Crucial M4 SSD inside the SilverStone 2.5" to 3.5" Bay Converter in the bottom position (there is room to install two SSD or two 2.5'' HDD), in order to align the SATA and power connectors with the iMac motherboard.


The following picture shows the newly installed SSD on the top left, and the WD Blue HDD inside the OptiBay enclosure on the bottom right. Notice I attached the thermal sensor for the SSD directly on the metal frame of the bay converter, and used tape to make sure it stays in position.


All the hardware parts described above fitted perfectly in my iMac and I didn't have to do anything special to install them except for adding the piece of foam in the OptiBay enclosure to prevent the HDD from moving around.

Software Configuration

At this point my iMac had two new unformatted disk drives and my original HDD was sitting on my desk. What I had in mind was to install Mac OS on the Crucial M4 SSD, and put the users on the WD Blue HDD. In fact 64 GB are not enough to store the users directories where for example pictures and movies take a lot of disk space. To restore the system I then followed this procedure.
  • I took the original WD caviar green HDD and installed it in a Rosewill external SATA enclosure I had laying around. Then I connected the external SATA enclosure to the iMac via an USB cable.
  • I powered up the iMac holding the option button. This gave me the option to boot into Mountain Lion from the external WD Caviar Green HDD (volume name Macintosh HD).
  • I logged in and opened the Disk Utility application. Selected the Crucial M4 disk, clicked on the Erase tab and formatted the disk by selecting the Mac OS Extended (journaled) format and naming the volume Macintosh SSD.
  • In a similar way I erased the WD Blue HD disk and named the volume Macintosh HD Users. At the end of this procedure, Disk Utility showed the following on the screen:

  • Then I ran Carbon Copy Cloner and copied all directories from the external Macintosh HD except the /Users directory to the Crucial M4 on volume Macintosh SSD (it is simple to do this since Carbon Copy Cloner allows you to select individual directories to copy from the source). I ended up copying about 32 GB to the Macintosh SSD volume, which took about 1 hour. 
  • I ran Carbon Copy Cloner again but this time for source I selected the /Users directory only from the external Macintosh HD, and Macintosh HD Users for destination. To copy 693 GB Carbon Copy Cloner took about 7 hours and 47 minutes.
  • (If you don't want to use Carbon Copy Cloner, you can copy the files directly using the ditto command. For example to clone the /Users directory: 

  • # sudo ditto /Volumes/Macintosh\ HD/Users /Volumes/Macintosh\ HD\ Users/Users/
    )

  • I then opened the Terminal app, logged in as root and created a symbolic link to the new location of the /Users directory:

  • # sudo su -
    # cd /Volumes/Macintosh\ SSD
    # ln -s /Volumes/Macintosh\ HD\ Users/Users/ Users
At this point I rebooted the iMac and when it came back all my original logins with their setting were magically preserved. MacOSX now boots in 13 seconds, and opening applications is almost instantaneous. Now I still had to do some tweaks to make the new setup even better. I followed the suggestion from Martin's blog (Optimizing MacOS X Lion for SSD).
  1. I went to System Preferences, clicked on Users & Groups, clicked the lock icon to unlock the advanced editing. Once unlocked, I right-clicked on each user account and chose Advanced Options from the pop-up menu. Once in the Advanced Options dialog, I changed the Home directory of the user from /Users/user-name to the new location (/Volumes/Macintosh\ HD\ Users/Users/user-name).
  2. I installed and enabled TrimEnabler from this web site.
  3. I set the noatime flag to prevent MacOS from updating the SSD file system every time a file is accessed.
  4. I used the WD Blue HDD for temporary files.

    sudo ditto /private/tmp /Volumes/Macintosh\ HD\ Users/private/tmp
    sudo rm -rf /private/tmpsudo ln -s /Volumes/Macintosh\ HD\ Users//private/tmp /private/tmp
I rebooted the iMac another time and verified that Trim was working, the root file system was mounted with the noatime flag and that temporary files were going to the HDD drive instead of the SSD.
Given new life to an old machine. I'm pretty happy now.
Read More
Posted in Apple, iMac, MacOSX | No comments

Tuesday, 4 December 2012

Configuring the Apple Airport Extreme with Verizon FIOS

Posted on 19:51 by Unknown
I have Verizon FIOS triple-play service and I love the TV picture quality and internet speed and reliability, but I don't like Verizon's solution to my Parental Control needs.
So I've decided to buy an Airport Extreme Base Station (AEBS) from Apple, but when I went to set it up, it configured itself for bridged mode since the Verizon modem is also a router and the Airport Utility decided not to have a double NAT configuration. Anyway by doing so you loose the capability of having a guest network with the Airport Extreme since it dummies itself down from a full fledged router to a simple level-2 switch.
So I managed to manually set it up in DHCP/NAT mode even though it is initially complaining about a double NAT configuration (one from the Verizon router and one from the AEBS), but least I gained my guest network back (at the time of this post it is not possible to configure a guest network with the Verizon router). 


Hardware Configuration


Apple Router: AirPort Extreme Base Station, Part Number: MD031LL/A 


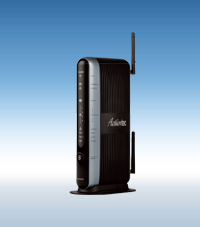
Verizon Modem/Router: Actiontec MI424WR Rev. I
  • I used a CAT6 Patch cable to connect the AEBS Internet WAN port to Ethernet Port 1 of the Actiontec. This setting allows the two routers to communicate at wire speed of up to 1 GB per second.


Software Configuration


Here is the step by step procedure to set up the Airport Extreme I ran from an iMac running Mountain Lion.


  • Click on the picture of the Airport Extreme base station: a popup window will show an Edit button
  • Click on the Edit button
  • Click on the Network tab and select "DHCP and NAT" from the Router Mode
  • Click on the Network Options button and select "10.0" for the IPv4 DHCP Range, and "172.16" for the Guest IPv4 DHCP Range. Click on the Save button (see picture below)


  • Click on the Update button: this will reset the AEBS and cause a solid yellow light with a status of Double NAT. The AEBS will advise you to switch back to bridge mode
  • Click on the Double NAT Status pull-down menu and select Ignore: after another reboot the AEBS should come up with a solid green color


Regarding the Actiontec configuration, I left it as is, except for disabling the wireless mode to avoid interference with the AEBS.

  • With an internet browser log on to http://192.168.1.1 using the login and password printed on the bottom of the MI424WR modem/router.
  • Click on the Wireless Settings icon:

Wireless
Settings
  • Click on Basic Security Settings from the left panel
  • Click on Off from the 1. Turn Wireless ON form entry
  • Click on the Apply button to disable wireless

Considerations

Having the Verizon DHCP server using the 198.168.1.xxx IP addresses range and the AEBS the 10.0.1.xxx range will keep you sane and prevent confusions in your mind about which sub-network you are connected to. 
In any case these two sub-networks are completely separated and invisible from the Internet and you cannot have a device connected to one subnet talk to another device on the other subnet (unless you start configuring forwarding ports on the AEBS of course). This is OK since I plan to keep all of my computers and devices on the subnet controlled by the AEBS in order to have access control over each device.
To my disappointment the Airport Utility version 6.1 used to configure the AEBS is probably one the worst application I ever used to set up a router. It's not intuitive and worst of all it doesn't show who's connected to your network (or at least it doesn't show all the connected devices). In fact it only shows wireless clients in a weird fashion (by hovering over the base station picture), but no sign of any device connected through the Gigabit ethernet ports. By the way the list of wireless client is dynamic and you cannot even copy/paste the MAC addresses to add later to the access control table. I ended up switching to the previous version of Airport Utility (version 5.6 - as suggested by several people on the Internet) since with that you can still get a list of all devices connected to the AEBS from the Advanced->Logs and Statistics->DHCP Clients tab.

Still for parental control AEBS only has a time-based table where you can setup a schedule on a per MAC address basis. So I still had to resolve the problem of preventing my kids from hitting questionable web sites. I solved that by setting the OpenDNS servers for primary and secondary DNS servers in my Verizon router. OpenDNS offer a basic parental control filter based on categories. But I found that is is adequate for my needs.

Read More
Posted in Apple, DHCP, GPON, Network, Router | No comments
Older Posts Home
Subscribe to: Posts (Atom)

Popular Posts

  • Transferring Files from a computer to your Android device
    Android devices have file systems similar to regular computers. Subject to permissions restrictions, we can transfer files from a computer t...
  • Meeting The Tate's
       Hello, we are Cody and Aimee Tate. We live in Florida and have been married for 3 years. Recently we have decided to start doing product ...
  • Python For Android (Py4A)
    A better solution for cross-compiling Python for Android is to use the Py4A project which is made to be used together with SL4A (Scripting L...
  • Problems with new version of rpmbuild
    The Problem With the new version of rpmbuild installed on CentOS 6.x, if you try to use an old RPM spec file, you will get an error like the...
  • Installing the Android SDK
    These instructions refer to a Ubuntu 12.04.1 LTS system running on an Intel processor. Head to the developer.android.com web site and downl...
  • Process Attribution In Network Traffic
    Author: Phil -at- DigitalOperatives Overview Digital Operatives recently completed a DARPA Cyber Fast Track (CFT) contract called  Process A...
  • Installing the Android NDK
    These instructions refer to a Ubuntu 12.04.1 LTS system running on an Intel processor. Head to the  http://developer.android.com/tools/sdk/n...
  • How to build the gcc Fortran cross-compiler for Android (ARM and x86)
    If you need to cross-compile for Android a program written in Fortran, you know already that the official Android NDK does not come with the...
  • LifeProof iPhone Case Review
       Today we are reviewing the LifeProof iPhone case, for iPhone 4 and 4S.  Like their slogan says its life-proof, which means waterproof, ...
  • How to Cross-Compile libiconv for Android
    If your legacy C/C++ code includes <iconv.h> to convert the encoding of characters from one coded character set to another, and you ne...

Categories

  • amazon
  • amazon.com
  • Android
  • Apple
  • Arduino
  • ARM
  • baby
  • baby reviews
  • back to school
  • beef jerky
  • bicycle. wagon
  • bike
  • Blanket Buddies
  • blogging
  • Blogging with The Tate's
  • books
  • busybox
  • camera
  • camera giveaway
  • candle giveaway
  • candles
  • CaseApp
  • CentOS
  • coffee
  • david haskell
  • dermorganic
  • DHCP
  • digital camera
  • events
  • Florida
  • Fortran
  • free blogger giveaway
  • free blogger sign-ups
  • full of flavor
  • giveaways
  • GNU
  • GPON
  • hair care
  • happy husband
  • Hot tea
  • Husband and Wife perspective
  • iMac
  • ipad
  • iphone
  • iphone case
  • iphone case review
  • Javascript
  • Keurig Coffee Review
  • Keurig Review
  • Kindle
  • ksh
  • LifeProof iPhone Case Review
  • Linux
  • MacOSX
  • Malachite Bloomers
  • man and women perspective
  • meat
  • Mips
  • Network
  • Pretzel Crisps
  • Pretzels
  • product reviews
  • products
  • Python
  • Router
  • scentsy
  • scentsy candles
  • school
  • scooter
  • security system
  • skin care
  • snacks
  • sony
  • sony cyber-shot
  • Stuff Animal
  • suface pro
  • Summer
  • summer fun
  • surface pro giveaway
  • techno thriller
  • Timjan Design
  • too much information
  • UNIX
  • vegan
  • vegan products
  • verizon
  • verizon fios
  • VitaminsBaby
  • waterproof case
  • Windows
  • x86
  • yummy

Blog Archive

  • ▼  2013 (41)
    • ▼  November (2)
      • Too Much Information, by: David Haskell, Book Review
      • VERIZON... What did you change?
    • ►  October (2)
    • ►  September (3)
    • ►  August (3)
    • ►  July (2)
    • ►  June (2)
    • ►  May (6)
    • ►  April (8)
    • ►  March (2)
    • ►  February (5)
    • ►  January (6)
  • ►  2012 (17)
    • ►  December (3)
    • ►  November (4)
    • ►  October (8)
    • ►  July (1)
    • ►  June (1)
Powered by Blogger.

About Me

Unknown
View my complete profile